Category: Wall Decor

  • Transform Your Space: Aesthetic Wall Shelves Decor Inspiration for Every Home

    Transform Your Space: Aesthetic Wall Shelves Decor Inspiration for Every Home

    Introduction

    Wall shelves are one of the most practical and stylish additions you can make to any room. They save floor space, keep things organized, and add personality to your walls. Whether you live in a small apartment or a big house, the right shelf setup can completely change how a room feels. If you are looking for aesthetic wall shelves decor inspiration, you are in the right place. This guide covers everything from shelf styles to common mistakes, so you can create a display that looks intentional and beautiful.

    Why Wall Shelves Are a Smart Decor Choice

    Why Wall Shelves Are a Smart Decor Choice

    Wall shelves do more than hold things. They tell a story about who you are.

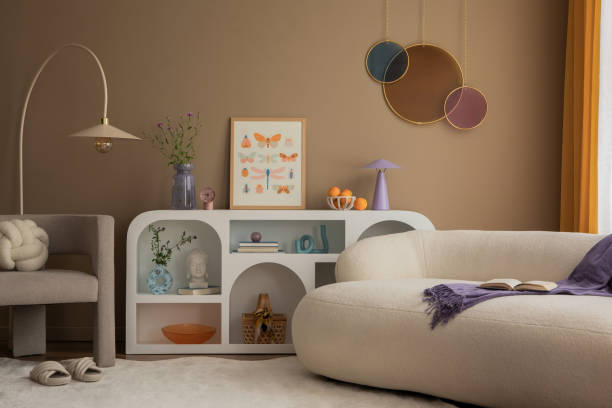
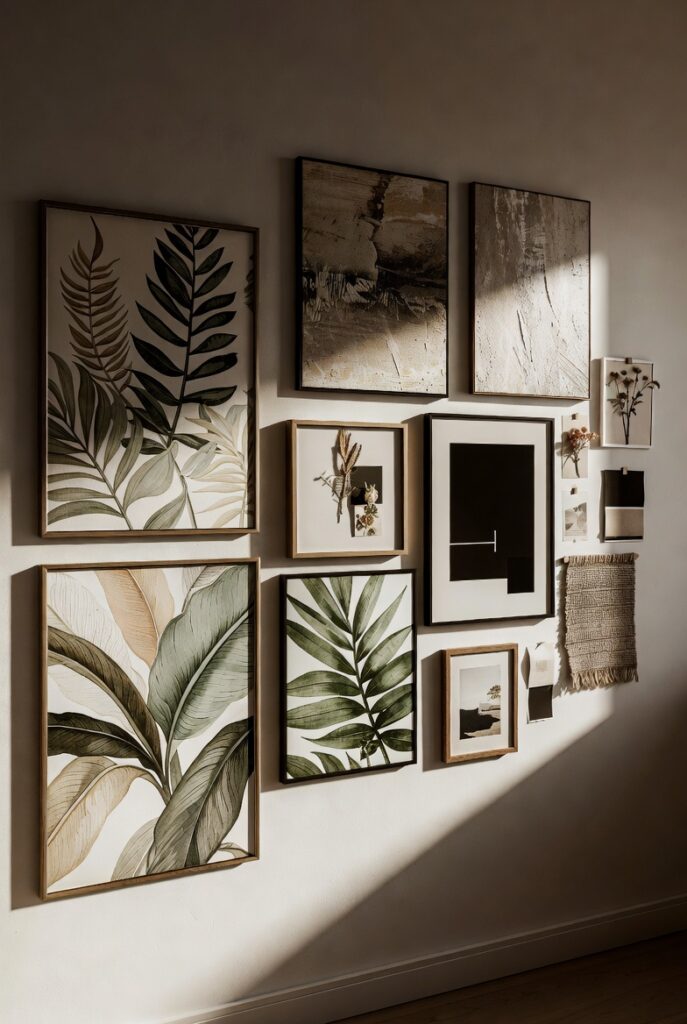
    A well-arranged shelf can become the focal point of a room. It draws the eye, adds texture, and brings a sense of warmth that bare walls simply cannot. The best part? You do not need to spend a lot of money to make them look great.

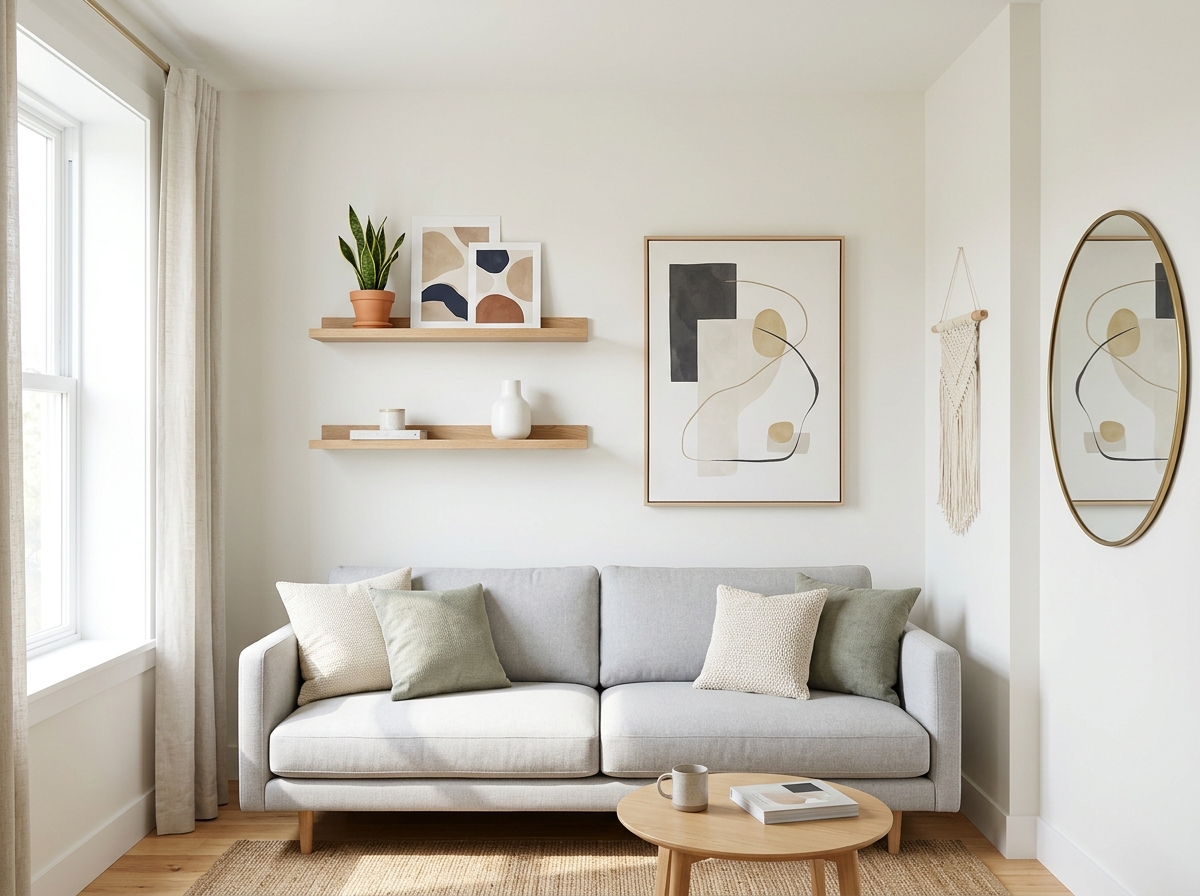
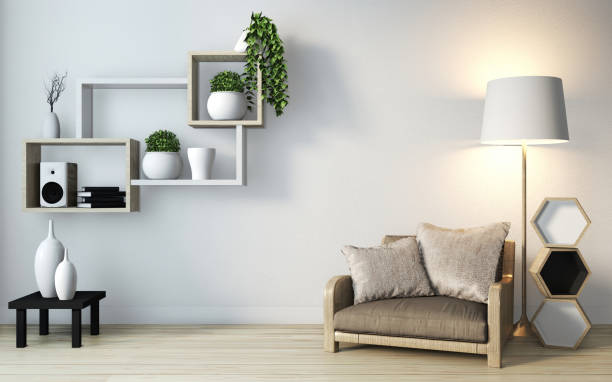
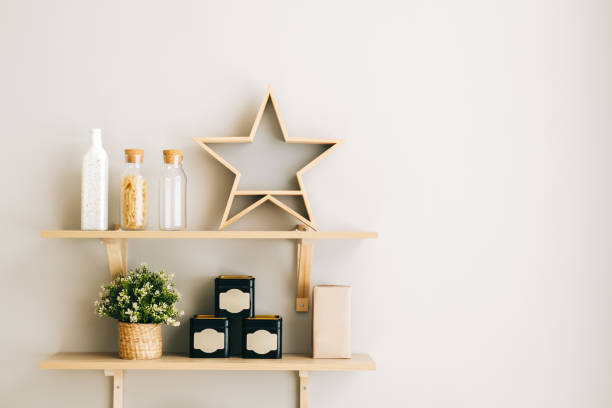
    Floating shelves are especially popular right now. They look clean and modern because there are no visible brackets. Wooden shelves add warmth, while metal ones bring an industrial edge. The material you choose sets the tone for the entire space.

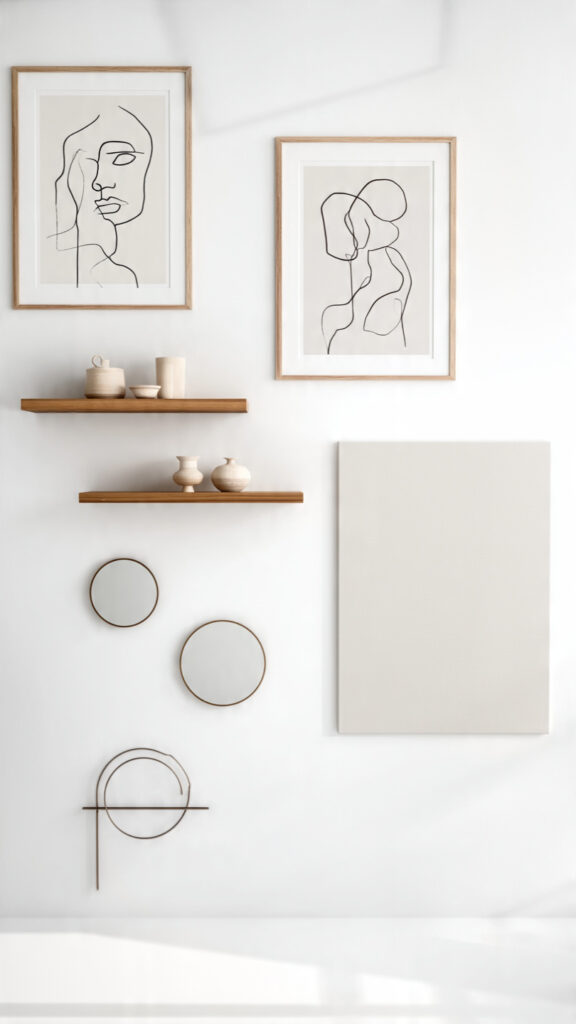
    Think about what the room already feels like. A cozy bedroom calls for soft wood tones and warm lighting. A home office might look better with sleek, minimal shelving. Matching the shelf style to the room’s vibe makes everything feel more connected.

    Types of Wall Shelves and How They Compare

    Not all shelves work the same way. Some are better for heavy books, while others are designed purely for display. Here is a quick comparison to help you choose.

    FeatureOption / TypeDescription
    StyleFloating ShelfMinimal look with no visible brackets; great for modern spaces
    MaterialReclaimed WoodAdds rustic charm and warmth; eco-friendly option
    FunctionCorner ShelfMaximizes unused corner space; ideal for small rooms
    SupportBracket ShelfTraditional design with visible support; very sturdy for heavy items
    FlexibilityModular ShelfCan be rearranged and expanded; perfect for growing collections

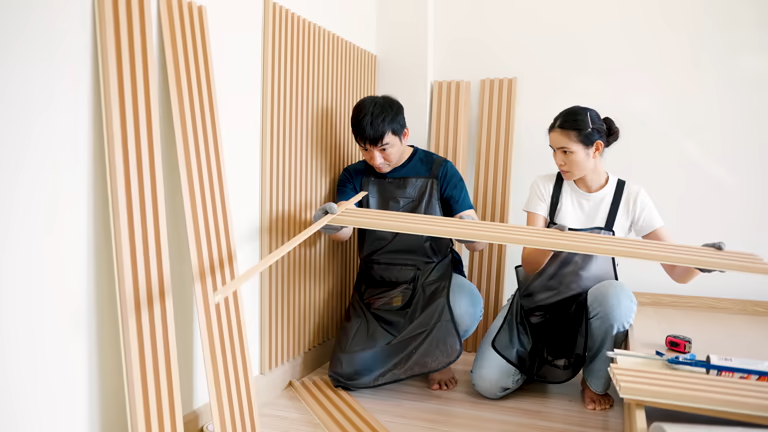
    Choosing the right type depends on your needs and the style of your home. Think about weight capacity, room size, and overall look before buying anything.

    Practical Tips for Styling Your Wall Shelves

    Practical Tips for Styling Your Wall Shelves

    Styling a shelf is a bit like decorating a tiny room. Balance is everything.

    Start with a few larger items, like a vase, a small plant, or a framed photo. Then fill in gaps with smaller objects. Odd numbers tend to look more natural — groups of three or five work really well.

    Do not just think about what looks good. Think about height and depth too. Vary the sizes of your items so the eye has places to rest and explore. A tall candle next to a small succulent next to a stack of books creates a natural rhythm.

    Lighting makes a huge difference. Small LED strip lights or a clip-on spotlight can make your shelf display look like it belongs in a magazine. It is a small touch that adds a big impact.

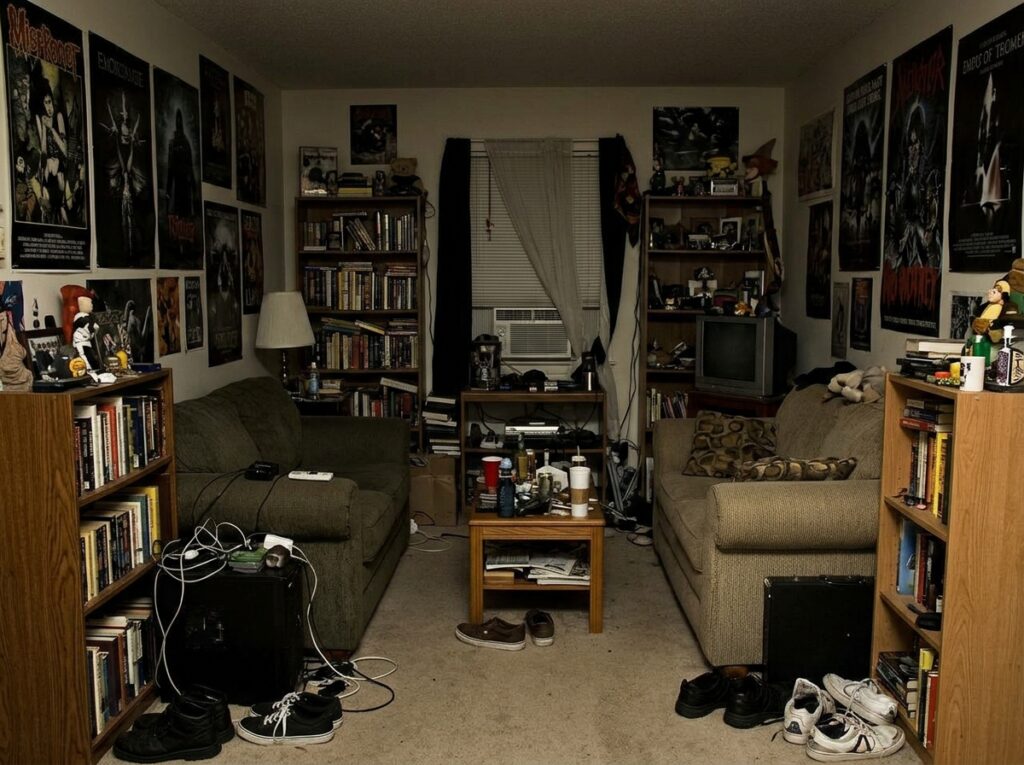
    Leave some empty space. It sounds counterintuitive, but a shelf that is too packed looks messy. Empty space lets each item breathe and stand out on its own.

    Benefits of Having a Well-Decorated Shelf

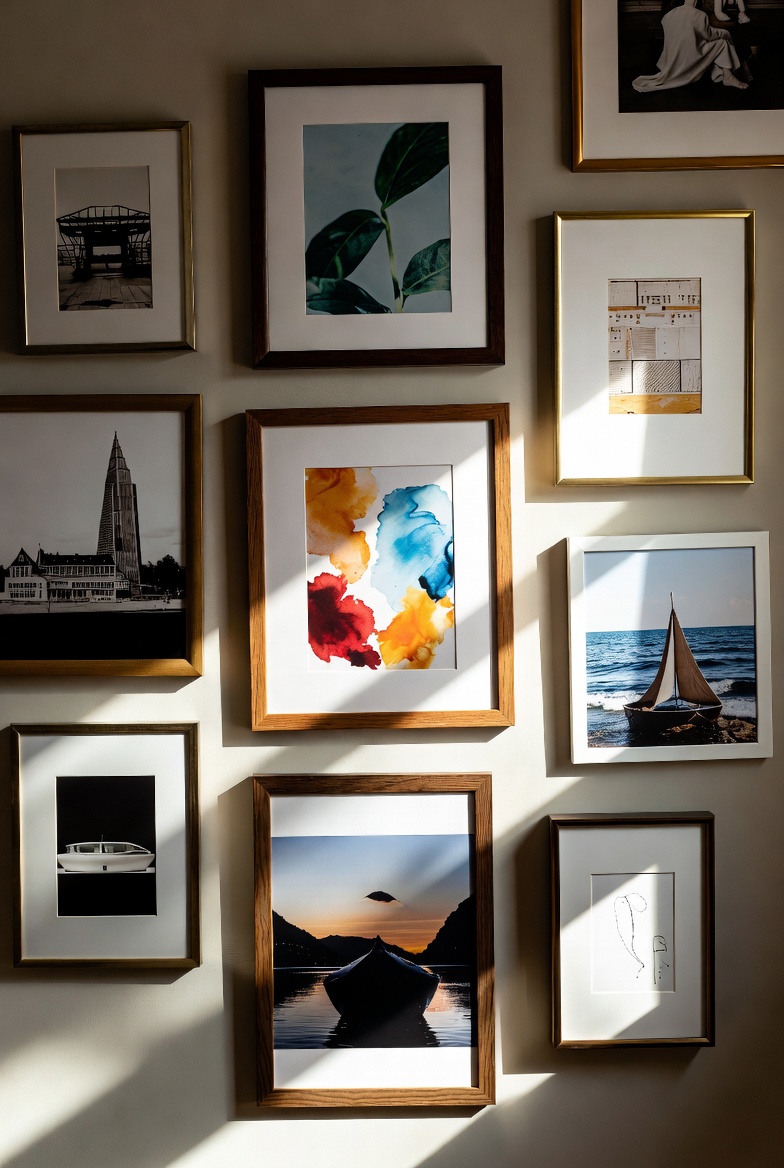
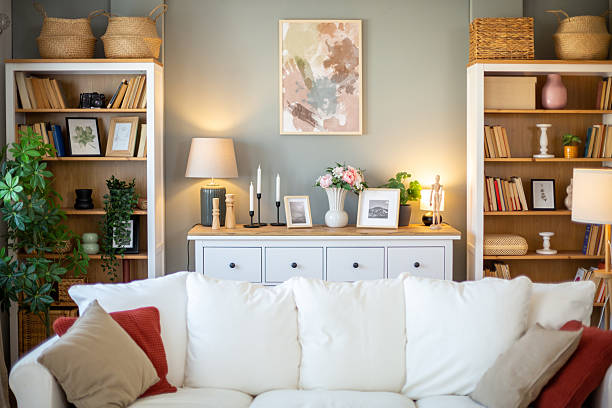
    A thoughtfully decorated shelf does a lot for your home. First, it adds personality. Your shelf can reflect your travels, your interests, or your love of plants.

    Second, it is functional. You can store books, display art, or keep everyday items within reach. Beauty and usefulness in one spot is always a win.

    Third, it can actually make a room feel larger. When you move clutter off the floor and onto the wall, the space below opens up. This is especially helpful in smaller homes.

    Common Mistakes People Make with Wall Shelves

    One of the biggest mistakes is hanging shelves too high. If you cannot easily see or reach what is on the shelf, it loses its purpose. Eye level is usually the sweet spot.

    Another mistake is using too many different styles. Mixing five different shelf types in one room can feel chaotic. Sticking to one or two styles keeps things cohesive.

    Overcrowding is also a problem. More items do not always mean more style. Sometimes, less really is more.

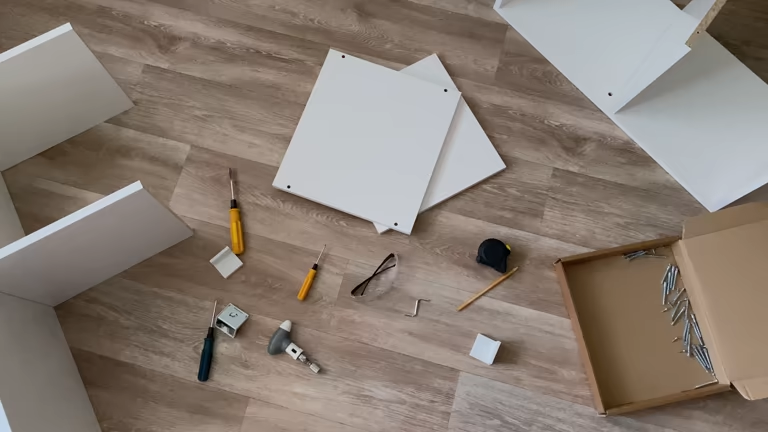
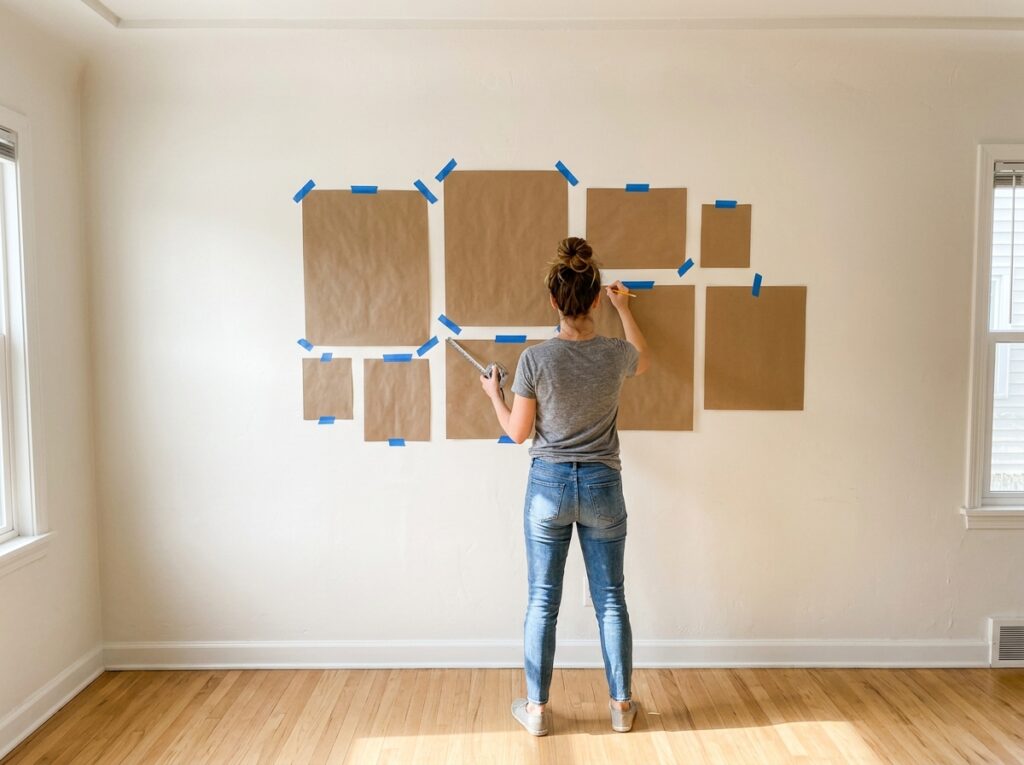
    Finally, many people forget about wall anchors and studs. A shelf that is not properly secured can fall, especially if it holds anything heavy. Always use the right hardware for your wall type.

    Expert Tips for a Polished Look

    Interior designers often use a simple trick called the “triangle rule.” Arrange three items of different heights to form a triangle shape. It creates natural visual flow without looking forced.

    Rotate your shelf items seasonally. Swap out summer flowers for autumn pinecones. This keeps your display feeling fresh throughout the year.

    Use a consistent color palette across the shelf. You do not have to match everything perfectly, but having two or three colors repeat across the display creates harmony.

    FAQs About Wall Shelf Decor

    Q: How many items should I put on one shelf?
    A: There is no fixed rule, but aim for three to five items per shelf. Leave some empty space so it does not look cluttered.

    Q: What goes well on aesthetic wall shelves?
    A: Plants, books, small art pieces, candles, and personal keepsakes all work beautifully together.

    Q: How do I make my shelf look more stylish?
    A: Vary the heights of your items, use a simple color palette, and add a small light source near the shelf.

    Conclusion

    Creating a beautiful shelf display is easier than most people think. With the right shelf type, a little planning, and some creativity, you can transform any wall into something worth admiring. Whether you are going for a cozy, minimal, or eclectic look, there are endless ways to find your own aesthetic wall shelves decor inspiration. Take it one shelf at a time, trust your instincts, and do not be afraid to rearrange until it feels right. Your walls deserve a little love too.

  • Transform Your Space: Fresh Modern Wooden Wall Panel Ideas for Every Home

    Transform Your Space: Fresh Modern Wooden Wall Panel Ideas for Every Home

    Introduction

    Wood has always had a way of making a room feel warm and inviting. But today, wooden wall panels are no longer just a rustic or traditional choice. They’ve become one of the most popular design trends in modern interior design. Whether you’re renovating your living room, bedroom, or home office, modern wooden wall panel ideas can completely change how your space looks and feels. The best part? There are options for every budget and every style. Let’s walk through everything you need to know to get started.

    Why Wooden Wall Panels Are So Popular Right Now

    Large luxury modern bright interiors Living room mockup illustration 3D rendering image

    Walk into any stylish home or hotel lobby these days, and you’ll likely spot wood panels on at least one wall. There’s a reason for that. Wood brings texture, depth, and a natural element that paint simply can’t replicate.

    Homeowners love it because it works in almost any room. It can make a small bedroom feel cozy or give a large living room a focal point. It also works well with other materials like metal, concrete, and glass.

    Another reason for its rise? Sustainability. Many wood panels today are made from reclaimed wood or eco-friendly materials. People who care about the environment often choose wood because it feels like a responsible, natural choice.

    Types of Modern Wooden Wall Panels: A Quick Comparison

    Before choosing panels for your home, it’s helpful to understand the different types available. Each has its own look, cost, and purpose. Here’s a simple breakdown:

    FeatureOption / TypeDescription
    MaterialSolid WoodDurable and natural; best for premium finishes
    MaterialMDF Wood PanelsBudget-friendly; easy to paint or laminate
    StyleSlat PanelsThin vertical strips; sleek, modern appearance
    Style3D Textured PanelsAdds depth and visual interest to flat walls
    FinishNatural/Raw FinishShows wood grain; great for organic, earthy décor

    This table gives you a starting point. The right choice depends on your room’s purpose, your budget, and the style you’re going for. Slat panels are especially trendy right now for accent walls in living rooms and bedrooms.

    Practical Tips Before You Start Installing

    Planning is key before you touch a single panel. Here are a few things to keep in mind.

    Measure twice, cut once. Sounds simple, but many people skip this step. Know the exact dimensions of your wall before ordering materials. It saves money and reduces waste.

    Think about the room’s lighting. Dark wood panels can look stunning but may make a small, poorly lit room feel even darker. If your room doesn’t get much natural light, go with lighter wood tones or add warm accent lighting.

    Decide on DIY vs. professional installation. Slat panels and peel-and-stick options are often manageable as a weekend project. However, heavier solid wood panels or complex patterns may need a professional. Don’t underestimate the job.

    Benefits of Adding Wood Panels to Your Walls

    Wood panels do more than just look good. They offer several practical advantages that many people overlook.

    Sound insulation is one big bonus. Wooden panels can help reduce echo in a room, making them great for home offices, media rooms, or bedrooms.

    Durability is another win. High-quality wood panels can last for decades with minimal care. Unlike wallpaper that peels or paint that chips, a well-installed wood panel holds up over time.

    They also add value to your home. Buyers often respond well to quality wood finishes during home viewings. It’s a detail that can set your home apart.

    Common Mistakes People Make With Wood Panels

    Even a great idea can go wrong without proper planning. Here are mistakes to avoid.

    Covering every wall. This is the most common error. Wood works best as an accent. Using it on all four walls can feel overwhelming and heavy. Pick one statement wall.

    Ignoring moisture levels. Bathrooms and basements have higher humidity. Not all wood panels are suitable for these spaces. Always check if your chosen panel is moisture-resistant before installing.

    Skipping the primer or sealant. Even finished panels benefit from a sealant, especially in high-traffic areas. It protects the surface and keeps the wood looking fresh longer.

    Expert Tips for Getting the Best Results

    Interior designers often share a few golden rules when working with wood wall panels.

    Mix textures, not just colors. Pairing smooth slat panels with a rough-grain texture nearby creates visual contrast without clashing. It keeps things interesting without being busy.

    Use vertical panels to make ceilings look higher. If your room feels short or boxy, vertical slat panels draw the eye upward. It’s a simple trick that makes a real difference.

    Don’t forget the trim. Finishing edges cleanly with matching trim or corner strips makes the whole installation look polished and professional. Small details matter a lot.

    FAQs About Wooden Wall Panels

    Q: Are wooden wall panels hard to maintain?
    Not really. Most only need dusting or a light wipe with a damp cloth. Sealed panels are even easier to clean.

    Q: Can I install wooden wall panels myself?
    Yes, many types are DIY-friendly, especially slat panels with peel-and-stick backing. Just make sure your walls are clean and flat.

    Q: Do wood panels work in small rooms?
    Absolutely. Light-colored panels or thin vertical slats can actually make a small room feel bigger and more open.

    Conclusion

    Adding wood to your walls is one of the simplest ways to elevate a room’s look and feel. From slat panels in a bedroom to 3D textured feature walls in a living room, there’s no shortage of modern wooden wall panel ideas to explore. The key is choosing the right type for your space, planning carefully, and keeping things balanced. Whether you go bold with a dark walnut finish or keep it light with natural pine, wood panels bring something warm and real to any room. Start small, enjoy the process, and let the wood do the work.

  • Less Is More: Minimalist Wall Decor Trends for Small Homes That Actually Work

    Less Is More: Minimalist Wall Decor Trends for Small Homes That Actually Work

    Introduction

    Decorating a small home can feel tricky. You want your space to look great, but you also don’t want it to feel cramped or overwhelming. That’s where minimalist wall decor trends for small homes come in. Instead of covering every inch of wall space, minimalist decor focuses on fewer, more intentional pieces. The result? A room that feels open, calm, and put together. Whether you’re working with a studio apartment or a cozy bedroom, the right wall decor can completely change how your space feels — without breaking the bank.

    Why Minimalist Decor Works So Well in Small Spaces

    Popular Types of Minimalist Wall Decor — A Quick Overview

    Small rooms have one big challenge — they can feel cluttered very quickly. Too much on the walls makes a space feel busier and smaller than it actually is.

    Minimalist decor solves this by using negative space wisely. Negative space is simply the empty area around your decor. When used well, it draws the eye across the room and makes walls feel taller and wider.

    It’s not about having nothing on your walls. It’s about being selective. One well-chosen piece of art can do more for a room than ten random frames hung together without any plan.

    This approach also makes cleaning and rearranging much easier. Fewer items mean less dust, less decision fatigue, and a home that’s always “guest ready.”

    Popular Types of Minimalist Wall Decor — A Quick Overview

    There are several styles within minimalist decor. Not every option suits every home, so it helps to know what’s out there before you choose.

    FeatureOption / TypeDescription
    Art StyleLine Art PrintsSimple, single-color drawings with thin lines. Very modern and subtle.
    MaterialWoven Wall HangingsTextured fabric pieces that add warmth without visual clutter.
    Color PaletteNeutral TonesWhites, beiges, and grays that blend with most room styles.
    Functional DecorFloating ShelvesShelves with minimal items like one plant or a small book stack.
    Statement PieceLarge Single CanvasOne oversized artwork instead of a gallery wall. Creates impact without chaos.

    Each of these options works well in tight spaces. The key is choosing one or two types that match your personal style rather than mixing everything together.

    Practical Tips for Decorating Small Walls Without Overcrowding

    Start by picking a focal wall — usually the one you see first when you walk into the room. This is where your main decor piece should go.

    Keep the rest of the walls simple. A single small print or nothing at all works perfectly on secondary walls. You don’t need to fill every surface.

    Use vertical space when possible. Tall, narrow artwork or a vertical shelf draws the eye upward and makes ceilings feel higher. This is one of the easiest tricks for small rooms.

    Stick to two or three colors maximum. When your decor shares a similar color family, the whole room looks more cohesive and intentional — even if the pieces are very different in style.

    Benefits of Keeping Your Wall Decor Simple

    The biggest benefit is visual calm. A clutter-free wall gives your brain a place to rest. This matters more in a small home where every inch is visible.

    Simple decor is also more timeless. Trendy gallery walls with dozens of frames can look dated after a few years. A clean, well-placed print tends to stay stylish much longer.

    Budget-wise, minimalism actually saves money. Instead of buying ten small items, you invest in one or two quality pieces. That’s better for your wallet and better for the environment too.

    Common Mistakes to Avoid When Decorating Small Walls

    One of the most common mistakes is hanging decor too high. Most people hang art at eye level or slightly above — not near the ceiling. A good rule: the center of your artwork should sit around 57 to 60 inches from the floor.

    Another mistake is choosing pieces that are too small for the wall. A tiny frame on a large empty wall looks lost and awkward. When in doubt, go slightly bigger than you think you need.

    Don’t skip planning. Many people buy decor before measuring their wall space. Always measure first, then shop. It saves time and avoids a lot of returns.

    Expert Tips to Get the Minimalist Look Just Right

    Interior designers often suggest the “one statement, one accent” rule. Pick one main piece for your wall, then add one small accent nearby — like a small plant on a shelf below it. That’s it.

    Use frames with thin, simple borders. Thick, ornate frames add visual weight. Thin black or natural wood frames keep things light and modern.

    Try temporary options first. Removable wall strips let you test placement before making permanent holes. This is especially helpful in rental apartments.

    Natural light also plays a role. Decor placed near a window catches light beautifully and adds depth to a room without adding more stuff.

    FAQs About Minimalist Wall Decor for Small Homes

    Q1: How many pieces of wall decor should I have in a small room?
    For most small rooms, one to three pieces is plenty. A single large artwork on a focal wall often works best.

    Q2: What colors work best for minimalist wall decor?
    Neutral shades like white, beige, soft gray, and muted earth tones are ideal. They keep things calm and cohesive.

    Q3: Is minimalist decor only for modern homes?
    Not at all. Minimalist principles — simplicity, intentionality, and breathing room — can work in any style, from Scandinavian to bohemian to traditional.

    Conclusion

    Decorating a small home doesn’t mean settling for less style. It means making smarter choices. Minimalist wall decor trends for small homes show us that one great piece beats ten okay ones every single time. By focusing on quality over quantity, choosing the right scale, and giving your walls room to breathe, you can create a space that feels both beautiful and comfortable. Start small, stay intentional, and trust that simplicity really does speak the loudest in a well-designed home.

  • DIY Gallery Wall Ideas 2026: Fresh Ways to Transform Your Blank Walls

    DIY Gallery Wall Ideas 2026: Fresh Ways to Transform Your Blank Walls

    Introduction

    A blank wall is like an empty canvas. It’s waiting for your personal touch. Whether you just moved into a new place or want to refresh your space, a gallery wall is the perfect project. DIY gallery wall ideas 2026 are all about mixing textures, playing with scale, and showing off your personality without spending a fortune. You don’t need to hire a designer or buy expensive frames. With a little planning and creativity, you can build a stunning wall display that feels like you. Let’s walk through the freshest trends and practical tips to get it right.

    What’s Trending in Gallery Walls This Year

    What's Trending in Gallery Walls This Year

    Gallery walls have come a long way from simple photo grids. In 2026, the biggest shift is toward organic, asymmetrical layouts. People are mixing framed art with mirrors, woven baskets, small shelves, and even dried flower arrangements. The “curated chaos” look is huge right now.

    Another strong trend is the use of oversized statement pieces as anchors. Instead of filling a wall with twenty small frames, many homeowners start with one large print and build around it. Earth tones, muted pastels, and black-and-white photography continue to dominate color palettes.

    Textured frames made from wood, rattan, and recycled materials are also replacing sleek, uniform frames. The goal is warmth and individuality over perfection.

    Comparing Popular Gallery Wall Styles

    Comparing Popular Gallery Wall Styles

    Choosing a style depends on your room, your taste, and how much effort you want to invest. Here’s a quick breakdown of popular options:

    FeatureOption / TypeDescription
    LayoutAsymmetrical GridFrames of different sizes arranged loosely, creating a casual and modern feel.
    LayoutSymmetrical GridIdentical frames in a clean, evenly spaced pattern — perfect for minimalists.
    Mix TypeArt + ObjectsCombines framed prints with 3D items like mirrors, clocks, shelves, or woven pieces.
    ThemeBlack & WhiteAll artwork in monochrome tones for a cohesive, sophisticated look.
    ThemeEclectic Color MixBold colors and varied art styles for a playful, personality-driven wall.

    This table should help you narrow down what fits your space before you pick up a hammer.

    Practical Tips for Planning Your DIY Gallery Wall

    Before putting any nails in the wall, plan everything on the floor first. Lay your frames out on the ground or use painter’s tape to map placements on the wall. This saves you from unnecessary holes and frustration.

    Start with the center piece and work outward. Keep spacing consistent — about two to three inches between frames works well for most layouts. Use a level for straight lines, but don’t stress over tiny imperfections. That’s part of the charm.

    Pick a unifying element. It could be matching frame colors, a consistent art style, or a shared color palette in the prints. This thread of connection keeps everything from looking random.

    Also, consider the wall color. A gallery wall pops best against neutral backgrounds like white, cream, light gray, or soft beige.

    Benefits of Creating a Gallery Wall Yourself

    Benefits of Creating a Gallery Wall Yourself

    The biggest advantage of a DIY gallery wall is cost savings. You control the budget completely. Thrift store frames, free printable art, and personal photos can create a wall that looks like it cost thousands — for under fifty dollars.

    It’s also deeply personal. Unlike store-bought wall décor sets, your gallery wall tells your story. Family photos, travel memories, kids’ artwork, and prints from independent artists all come together in a way that no catalog can replicate.

    A well-designed gallery wall also adds visual interest to rooms that feel flat or unfinished. It draws the eye, creates a focal point, and makes a space feel lived-in and warm.

    Finally, it’s flexible. You can swap out prints, add new pieces, or rearrange whenever you feel like a change. No commitment required.

    Common Mistakes to Avoid with DIY Gallery Walls

    One of the most frequent mistakes is hanging everything too high. Art should be at eye level — roughly 57 to 60 inches from the floor to the center of the arrangement. Many people hang frames near the ceiling, which disconnects the wall from the furniture below.

    Another mistake is using frames that are all the same size and shape. Uniform grids work in specific settings, but they can feel rigid and boring if you’re going for a relaxed vibe. Mix sizes and orientations for depth.

    Ignoring scale is another pitfall. A tiny cluster of frames on a huge wall looks lost. Match the size of your gallery to the size of your wall. Fill at least two-thirds of the available space.

    Lastly, rushing the process leads to regret. Take your time selecting pieces that genuinely resonate with you. A gallery wall built over weeks or months often looks more authentic than one assembled in a single afternoon.

    [GENERATE IMAGE: A close-up of a wall with poorly spaced and crooked picture frames, showing common gallery wall mistakes, slightly messy arrangement, realistic indoor setting, natural lighting, 4K, no text]

    Expert Tips for a Professional-Looking Finish

    Interior designers often recommend using paper templates before hammering. Cut paper to the size of each frame, tape them to the wall, and step back to evaluate. Adjust until it feels right, then replace paper with actual frames.

    Lighting matters more than most people realize. A picture light above your largest piece or a small spotlight can elevate the entire wall from casual to gallery-worthy.

    Consider layering. Lean one or two frames on a floating shelf within the arrangement. This adds depth and breaks the flat plane of the wall.

    If you’re working with DIY gallery wall ideas 2026 trends specifically, try incorporating at least one non-art element — a small round mirror, a woven wall hanging, or a mounted planter. This dimensional mix is what separates a current gallery wall from an outdated one.

    Don’t forget to step back frequently. View the wall from the main seating area in the room. That’s where you’ll see it most, and that’s the angle that matters.

    Frequently Asked Questions

    Q1: How many frames do I need for a gallery wall?
    It depends on the wall size, but a good starting point is five to nine pieces for a medium-sized wall. You can always add more over time.

    Q2: Can I create a gallery wall without nails?
    Absolutely. Command strips, adhesive hooks, and picture-hanging strips work great for renters or anyone who wants to avoid wall damage.

    Q3: What’s the best room for a gallery wall?
    Living rooms and hallways are the most popular spots, but gallery walls also look fantastic above staircases, in bedrooms, and even in home offices.

    Conclusion

    Creating a gallery wall doesn’t require a big budget or professional skills. It just takes a bit of patience, a clear vision, and willingness to experiment. The best DIY gallery wall ideas 2026 focus on personal expression over perfection. Mix your favorite photos with art prints, mirrors, and textured objects. Plan your layout before you start drilling. And most importantly, have fun with it. Your walls should reflect who you are and what you love. Start small if you need to — you can always grow your gallery over time. That’s the beauty of doing it yourself.